
On Saturday April 28, 2012 The New London Quilt Guild held a Spring Sew-In at the new London United Methodist Church basement. It was a free of charge, open to the public event where any one was interested in learning about quilting and the guild was more than welcome to attend.
The Sew-In could not have been planned on a more perfect day. It was cold and raining, which is always a good excuse for any quilter to say in and sew. Not to mention a perfect day to learn new skills too! There were many classes and demonstrations taught at the Sew-In. There was Hawaiian quilting, various ways to applique, to what is hot and new in the quilting world, and so (sew) much more that our members were willing to share.
As mentioned we did offer a few classes and demonstrations through out the day.
Our first class of the day was taught by Sue Culbertson.
One of Sue's specialities is Hawaiian Quilting.
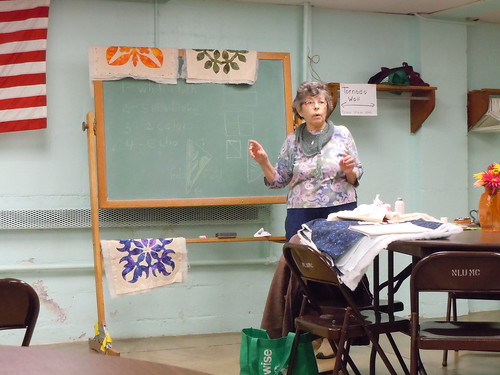
Sue had explained the origins of Hawaiian Quilting and how it came to be. Sue also explained that Hawaiian quilts or the cut outs have certain meanings. Take for instance the bread seed. To you or anyone else the bread seed is just a breadfruit. But to the quilter it could have a different meaning. It could be a shared memory with the quilter and the quilter's other half and only the two of them know what it stands for. Sue also explained that Hawaiians have their own way of calling some one out on copying their work. See each family has their own design and if you copied that design well, lets just say there will not be so many nice things sung about you in public. Yep, that's right sung! Or to put it properly that they would sing bad things about you for stealing their work. Wow coconut wireless at its best! Makes you glad that you only have to pay $35.00 to the US copyright office these days.
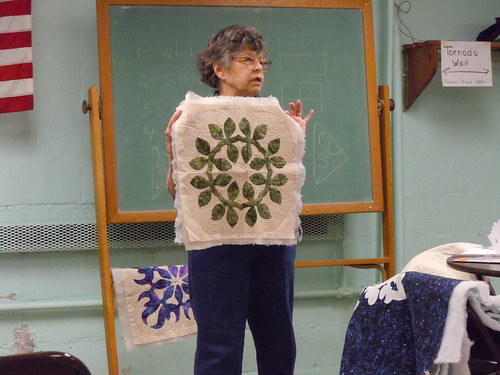
For Sue's lesson she had passed out a square sheet of paper. Sue then showed everyone how to correctly fold the paper so that the next step was to draw the design. The design that Sue had everyone draw was the bread seed. She then proceed to show everyone how to cut the design out. In the end we all had a bread seed snowflake. Sue then explained that you always do Echo Quilting with Hawaiian Quilting. Echo Quilting is where you quilt on the outside or around the design. This is to represent the waves and the wind. Sue also said that you even echo quilt in side the design too.
At the end of Sue's lesson she had discussed life in the West Indies and explained that they have tons of fabric over there but it is mainly for clothing and Carnival. Sue had lived in the West Indies for some time and her husband is from there. Sue had said, that even to this day it amazes her on how much fabric that they use on the Carnival costumes for such little or nothing of a costumes that they are.
The second class of the day was taught by Yvonne Westover.
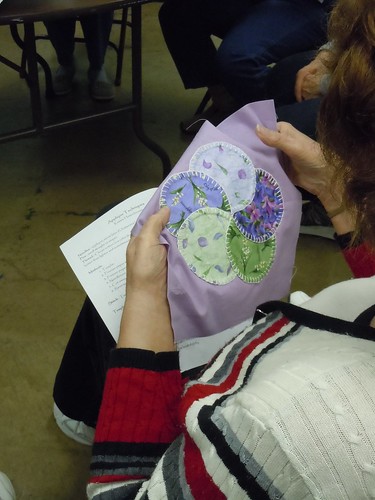
Yvonne's speciality is applique.
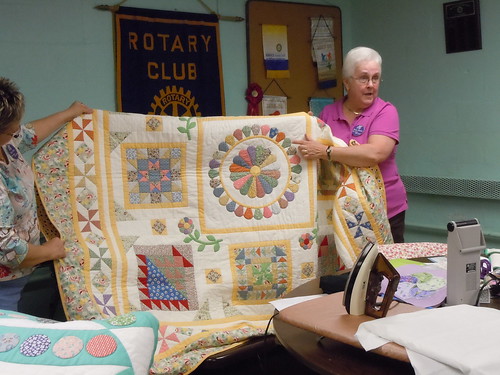
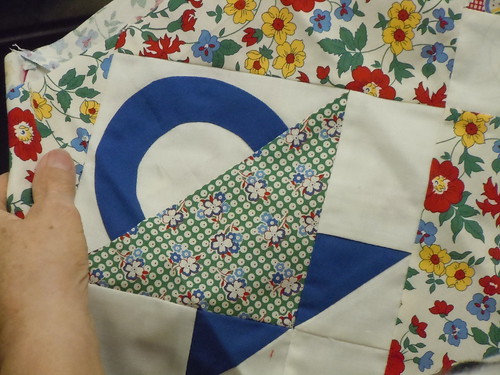
Yvonne had discussed the many possibilities of applique. Yvonne had brought in a few of her quilts that demonstrated the various types of appliques. For instance in the picture above Yvonne used English paper piecing on the small flowers. She went on to teach needle turn applique, perfect circles, and Best Press applique. She even showed everyone how to get the prefect looking stems and what type of templates to use. Yvonne went on to discuss the different type of stitching used in applique as seen the the photo below. This example is of a blanket stitch.
This is an example of the basket handle and how to make your stitches not appear on the top of your quilt.
Yvonne had said the best thing about doing applique is that it relaxes her, and you can take it almost any where.
The third class of the day was taught by Chris Porter.
Chris's speciality is doing what makes her heart strings sing.
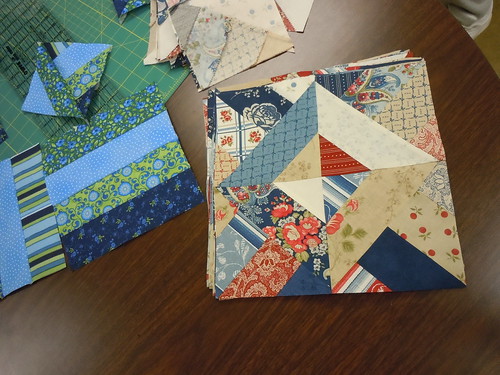
However, in this class Chris taught what you can do with a Jelly Roll.

A jelly roll is 42- 2 1/2" strips of fabric rolled to look like a pastry roll. Chris had found this pattern online and could not resist to share. Chris taught everyone how to take four jelly roll strips sew them together to make one strip block. Take four more strips and make another block. Then Chris demonstrated if you take both blocks and put them right sides together, sew around all edges, then cut them as X marks the spot you get another amazing new block. Chris even showed how if you take all four new cuts that you get a completely new block as seen in the photo below. This type of block is a great example of a mix of modern and traditional quilting.
After Chris's class everyone took a break for lunch, which was provided for via pot luck. Everything that was brought in was excellent! This also gave quilters a time to chat and relax. Once lunch was over there was only a few more classes left.
The fourth class of the day was taught by Jennifer Overstreet
Jennifer's speciality is designing quilts.
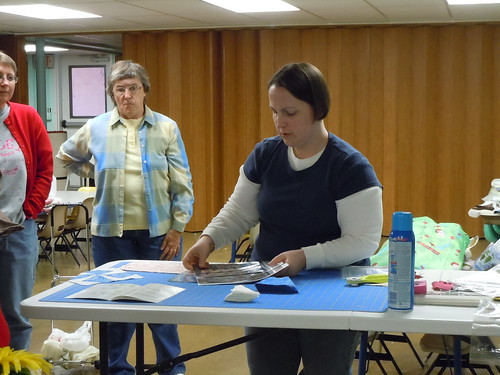
Before you can truly design you need tools. Jennifer brought in different types of rulers from Creative Grids along with different patterns (none of hers but patterns from different designers) to demonstrate how to use these rulers. Jennifer also demonstrated different tips from ergonomically setting up a cutting/pressing station, how to use an eraser clean up of the cutting mat, to taking an empty coffee creamer canister and reusing it to hold the water for your iron. Jennifer then went onto teach the basics of free motion quilting and how to baste a quilt using Frog Tape.
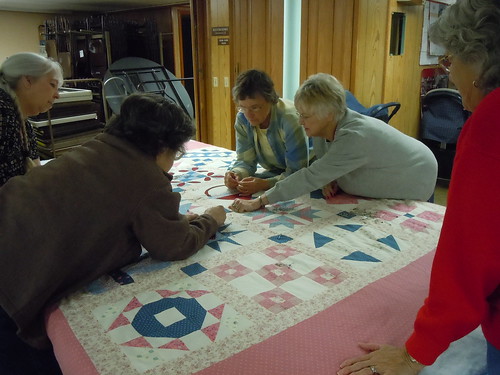
After Jennifer's class everyone went onto sewing and socializing. While a few of the member helped Carol Schaffer baste her quilt.
Marlene and Kim managed to get some sewing in.

After a while there was one more class to be taught.
The fifth class of the day was taught by Chris Porter and Yvonne Westover.
Together Chris and Yvonne taught how to make binding and how to bind a quilt. You'll have to excuse the us for not having any photos of the teamed effort of Chris and Yvonne, our photographer was so engrossed on Chris's continuous binding lesson that they forgot to take any pictures. Both ladies had a special binding ruler for each of their lessons. Chris as mentioned taught everyone on how to make a continuous binding by using a binding ruler. She used the ruler on a open half yard of fabric by marking lines. Chris then folded the fabric and stitched across a straight line. The way that the tube of fabric if you will was left to have two pointed ends to start cutting the binding. With Chris's method this allows a quilter to make the binding without having to cut pieced and sew them together.
Yvonne then showed every one how to place the binding onto the quilt and how to go about finishing it off. Yvonne had a special binding ruler that was smaller than the one Chris had but this ruler helped miter the meeting ends of the binding. This ruler allows a quilter to finish off the ends with no worries of having gaps or over lapping to much or even eek shorten the binding at the end.
After the binding class with Chris and Yvonne everyone started to pack up and called it a day. We were all asked if we would like to do another Sew-In again and everyone agree to have another one. Maybe in the summer we all jokingly agreed. Maybe a luau some one shouted! Yes, a luau while we all wear our muumuus, some one else said. Sound like a good idea!
In all we all had a good time. The lesson and demos were wonderful. The food was excellent, and the good company and conversations were very pleasant indeed.
To see more photos of the Sew-In please visit our Flickr page!
Thank you for stopping by!
Happy Quilting Everyone!
New London Quilt Guild